Spring Boot支持本地化消息,这样你的应用程序就可以满足使用不同语言首选项的用户。 Spring Boot会在类路径的根目录中查找message资源包的存在。
当配置的资源包的默认属性文件可用时(
messages.properties默认)。 如果资源包只包含特定于语言的属性文件,则需要添加默认值。 如果没有找到与任何配置的基本名称匹配的属性文件,则不会有自动配置的MessageSource。
资源包的基本名以及其他几个属性可以使用spring.messages命名空间,如下面的示例所示:
spring:
  messages:
    basename: "messages,config.i18n.messages"
    fallback-to-system-locale: false
一、快速开始
1.配置资源包
在response文件夹下新建 i18n文件夹,建立如下资源文件:
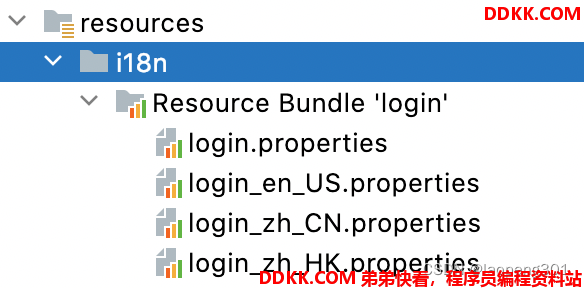
login.properties 默认
login.username=用户名(默认)
login.sign=登陆(默认)
login.password=密码(默认)
login.pagename=登录页面(默认)
login_en_US.properties 英文-美国
login.username=Username
login.sign=Sign in
login.password=Password
login.pagename=Login Page
login_zh_CN.properties 中文简体-中国
login.username=用户名
login.sign=登陆
login.password=密码
login.pagename=登录页
login_zh_HK.properties 中文繁体-香港
login.username=用戶名
login.sign=登錄
login.password=密碼
login.pagename=登錄页
2.配置资源文件路径
spring:
  messages:
    basename: "messages,i18n.login"
3.新建页面
模版引擎使用thymeleaf:
   <dependency>
            <groupId>org.springframework.boot</groupId>
            <artifactId>spring-boot-starter-thymeleaf</artifactId>
   </dependency>
   <dependency>
    <groupId>org.springframework.boot</groupId>
    <artifactId>spring-boot-starter-web</artifactId>
</dependency>
/resources/templates/login.html
<!DOCTYPE html>
<html lang="en" xmlns:th="http://www.thymeleaf.org">
<head>
    <meta charset="UTF-8">
    <title th:text="#{login.pagename}"></title>
</head>
<body>
<form action="" method="post">
    <label th:text="#{login.username}"></label>
    <input type="text" name="username" placeholder="Username" th:placeholder="#{login.username}">
    <label th:text="#{login.password}"></label>
    <input type="password" name="password" placeholder="password" th:placeholder="#{login.password}">
    <br/>
    <button type="submit" th:text="#{login.sign}">[[#{login.sign}]]</button>
    <br> <br>
</form>
</body>
</html>
LoginController.java
@Controller
public class LoginController {
    @RequestMapping(value = "/")
    public String login() {
        return "login";
    }
}
4.启动测试
@SpringBootApplication
public class SpringBootInternationalizationApplication {
    public static void main(String[] args) {
        SpringApplication.run(SpringBootInternationalizationApplication.class, args);
    }
}
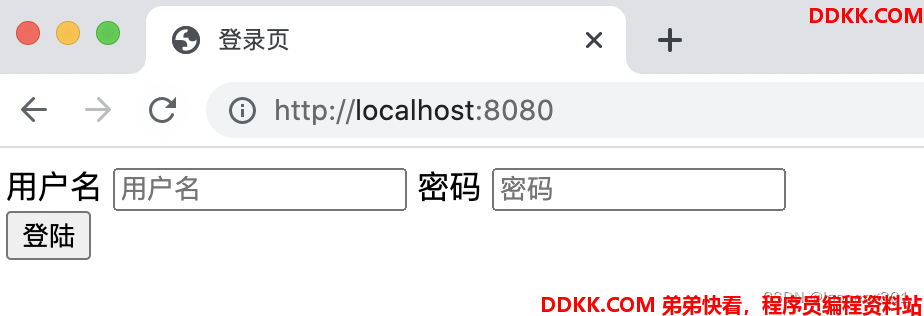
由于我的浏览器语言默认是简体中文,资源文件login_zh_CN.properties 生效,效果如下:
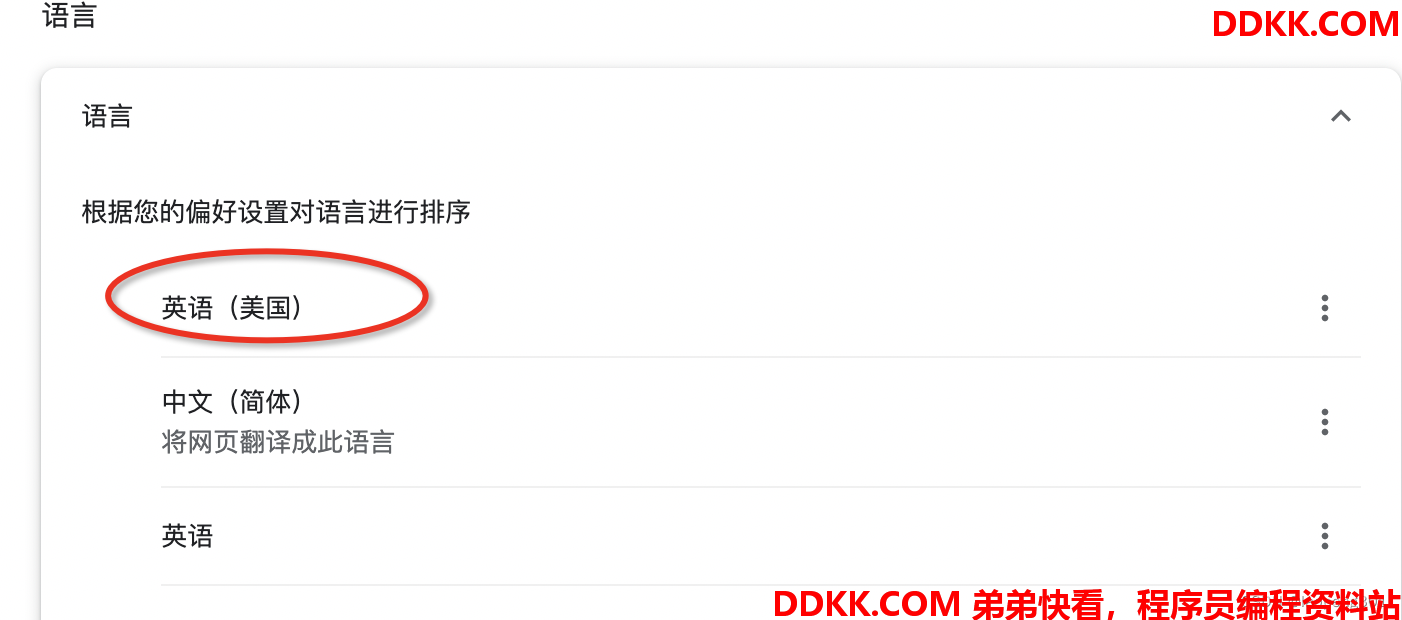
修改chrom浏览器语言,为英文-美国login_en_US.properties配置生效,效果如下:

二、自定义国际化解析
1.原理
国际化的切换主要是有一个LocaleResolver解析器在起作用(会根据locale返回的国家和语言,例如zh_CN表述中文-中国,来查找对应的xx_zh_CN.properties文件)
在WebMvcAutoConfiguration 自动配置类中,当用户没有创建自己自定义localeResolver时,默认会创建一个localeResolver(配置自己的localeResolver时,Bean名必须为localeResolver)
@Override
@Bean
@ConditionalOnMissingBean(name = DispatcherServlet.LOCALE_RESOLVER_BEAN_NAME)
public LocaleResolver localeResolver() {
	if (this.webProperties.getLocaleResolver() == WebProperties.LocaleResolver.FIXED) {
		return new FixedLocaleResolver(this.webProperties.getLocale());
	}
	AcceptHeaderLocaleResolver localeResolver = new AcceptHeaderLocaleResolver();
	localeResolver.setDefaultLocale(this.webProperties.getLocale());
	return localeResolver;
}
默认情况下使用的是LocaleResolver.ACCEPT_HEADER。Spring 提供了spring.web.*和spring.mvc.*来配置国际化相关配置。整个LocaleResolver相关实现类如下:

spring.web.locale-resolver、spring.mvc.locale-resolver(废弃) 配置使用的区域解析器可选值:fixed或accept_header。
1、fixed:表示Locale对象固定(需要设置spring.web.locale或spring.mvc.locale(废弃)具体的默认区域对象);
spring:
  web:
    locale-resolver: fixed  accept_header
    locale: en_US
如果设置为
fixed,但是没有配置spring.web.locale值,并且这个属性没有默认值,那么Locale区域对象将会使用运行主机的默认语言。
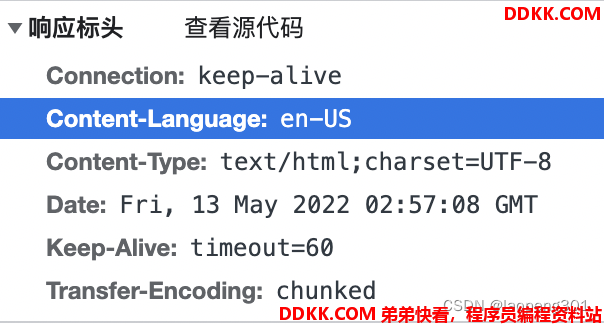
2、accept_header:使用次方式默认会解析请求头中的Accept-Language值,如果值为null使用默认的spring.web.locale值;
public Locale resolveLocale(HttpServletRequest request) {
        Locale defaultLocale = this.getDefaultLocale();
        if (defaultLocale != null && request.getHeader("Accept-Language") == null) {
            return defaultLocale;
        } else {
            Locale requestLocale = request.getLocale();
            List<Locale> supportedLocales = this.getSupportedLocales();
            if (!supportedLocales.isEmpty() && !supportedLocales.contains(requestLocale)) {
                Locale supportedLocale = this.findSupportedLocale(request, supportedLocales);
                if (supportedLocale != null) {
                    return supportedLocale;
                } else {
                    return defaultLocale != null ? defaultLocale : requestLocale;
                }
            } else {
                return requestLocale;
            }
        }
    }
2.自定义
快速开始章节,使用了默认的机制自动来实现国际化,如果让用户手动选择语言,那么需要自定义国际化解析器,实现LocaleResolver接口即可。要实现效果如下:

用户点击超链接传入local参数,值为选择的区域语言信息,后端定义resolveLocale解析参数,创建对应的Local信息。
    <a th:href="@{/login(local='zh_CN')}">中文(简体)</a>
    <a th:href="@{/login(local='zh_HK')}">中文(繁体)</a>
    <a th:href="@{/login(local='en_US')}">English</a>
自定义LocaleResolver 实现LocaleResolver接口,重写resolveLocale方法返回Locale对象。
//链接上可以携带local参数,值为指定的区域信息
public class MyLocaleResolver implements LocaleResolver {
    //解析请求
    @Override
    public Locale resolveLocale(HttpServletRequest request) {
        String language = request.getParameter("local");
        Locale locale = Locale.getDefault(); // 如果没有获取到就使用系统默认的
        //如果请求链接不为空
        if (!StringUtils.isEmpty(language)) {
            //分割请求参数
            String[] split = language.split("_");
            //国家,地区
            locale = new Locale(split[0], split[1]);
        }
        return locale;
    }
    @Override
    public void setLocale(HttpServletRequest httpServletRequest, HttpServletResponse httpServletResponse, Locale locale) {
    }
}
创建自定义的国际化解析器Bean:
  @Bean
    public LocaleResolver localeResolver(){
        return new MyLocaleResolverDemo();
    }
如果使用自定义的LocaleResolver,替换自动配置的默认解析器。
    @RequestMapping(value = "/login")
    public String login() {
        return "login";
    }
重启应用访问,不携带local参数,使用默认的配置:http://localhost:8080/login
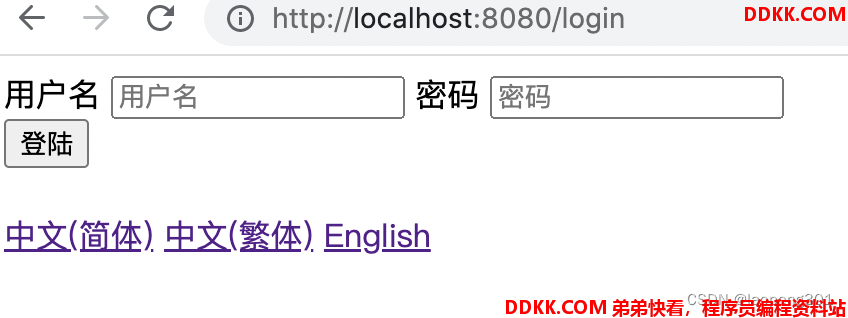
点击切换到English http://localhost:8080/login?local=en_US

这样就实现了,用户自主切换语言的功能。