环境准备
- 启动的ActiveMQ服务
- JDK1.8+
- IDEA或Eclipse
- Maven环境
- SpringBoot和ActiveMQ整合的依赖
<!--activemq启动器-->
<dependency>
   <groupId>org.springframework.boot</groupId>
   <artifactId>spring-boot-starter-activemq</artifactId>
</dependency>
<!--boot启动器-->
<dependency>
   <groupId>org.springframework.boot</groupId>
   <artifactId>spring-boot-starter</artifactId>
   <version>2.2.1.RELEASE</version>
</dependency>
<dependency>
   <groupId>org.springframework.boot</groupId>
   <artifactId>spring-boot-starter-web</artifactId>
</dependency>
<!--测试启动器-->
<dependency>
   <groupId>org.springframework.boot</groupId>
   <artifactId>spring-boot-starter-test</artifactId>
   <scope>test</scope>
</dependency>
<dependency>
   <groupId>junit</groupId>
   <artifactId>junit</artifactId>
   <scope>test</scope>
</dependency>
环境启动配置和代码
application.yml配置:
server:
  port: 7777
spring:
  activemq:
   你的activemq连接地址
    broker-url: tcp://47.98.163.118:8161:61616
   账号
    user: admin
   密码
    password: admin
  jms:
   指定连接的是队列(Queue)还是主题(Topic),false代表队列,true代表主题
    pub-sub-domain: false
queue:
  name: boot-queue-test
topic:
  name: boot-topic-test
ActiveMQ配置类:
package com.huazai.activemq.springboot.config;
import org.apache.activemq.command.ActiveMQQueue;
import org.springframework.beans.factory.annotation.Value;
import org.springframework.context.annotation.Bean;
import org.springframework.context.annotation.Configuration;
import javax.jms.Queue;
/**
 * @author DDKK.COM 弟弟快看,程序员编程资料站
 * @date 2022/1/16 19:13
 */
@Configuration
public class ActiveConfig {
    @Value("${queue.name}")
    private String queueName;
	@Value("${topic.name}")
    private String topicName;
    @Bean
    public Queue activeQueue() {
        return new ActiveMQQueue(queueName);
    }
	@Bean
    public Topic activeTopic() {
        return new ActiveMQTopic(topicName);
    }
}
启动类:
package com.huazai.activemq.springboot;
import org.springframework.boot.SpringApplication;
import org.springframework.boot.autoconfigure.SpringBootApplication;
import org.springframework.jms.annotation.EnableJms;
/**
 * @author DDKK.COM 弟弟快看,程序员编程资料站
 * @date 2022/1/16 18:51
 */
@SpringBootApplication
// 开启JMS服务
@EnableJms
public class BootQueueProviderMain {
    public static void main(String[] args) {
        SpringApplication.run(BootQueueProviderMain.class, args);
    }
}
队列生产者代码
package com.huazai.activemq.springboot.queue;
import org.springframework.beans.factory.annotation.Autowired;
import org.springframework.jms.annotation.JmsListener;
import org.springframework.jms.core.JmsMessagingTemplate;
import org.springframework.jms.core.JmsTemplate;
import org.springframework.stereotype.Service;
import javax.jms.JMSException;
import javax.jms.Queue;
import java.util.UUID;
@Service
public class QueueProviderService {
    /**
     * 相当于 {@link JmsTemplate}
     */
    @Autowired
    private JmsMessagingTemplate jmsMessagingTemplate;
    @Autowired
    private Queue queue;
    /**
     * 生产消息
     *
     * @throws JMSException
     */
    @JmsListener(destination = "${queue.name}")
    public void productMessage() throws JMSException {
        // 生产者生产并发送消息,此方法是send方法的加强版
        jmsMessagingTemplate.convertAndSend(queue, "消费者发送消息:" + UUID.randomUUID());
    }
}
队列消息发送测试类:
import com.huazai.activemq.springboot.BootQueueProviderMain;
import com.huazai.activemq.springboot.queue.QueueProviderService;
import org.junit.Test;
import org.junit.runner.RunWith;
import org.springframework.beans.factory.annotation.Autowired;
import org.springframework.boot.test.context.SpringBootTest;
import org.springframework.test.context.junit4.SpringJUnit4ClassRunner;
import javax.jms.JMSException;
/**
 * @author DDKK.COM 弟弟快看,程序员编程资料站
 * @date 2022/1/16 19:25
 */
@SpringBootTest(classes = BootQueueProviderMain.class)
@RunWith(SpringJUnit4ClassRunner.class)
public class QueueProviderTest {
    @Autowired
    private QueueProviderService queueProviderService;
    @Test
    public void testSend() throws JMSException {
        queueProviderService.productMessage();
    }
}
启动测试类,将消息发送到名称为boot-queue-test队列,结果如下:

队列消费者代码
消息监听消费服务:
package com.huazai.activemq.springboot.queue;
import org.springframework.jms.annotation.JmsListener;
import org.springframework.stereotype.Service;
import javax.jms.JMSException;
import javax.jms.TextMessage;
@Service
public class QueueConsumerService {
    /**
     * 监听接收的方法,监听的目的地名称为${queue.name}配置
     */
    @JmsListener(destination = "${queue.name}")
    public void receive(TextMessage textMessage) throws JMSException {
        String text = textMessage.getText();
        System.out.println("***消费者收到的消息:    " + text);
    }
}
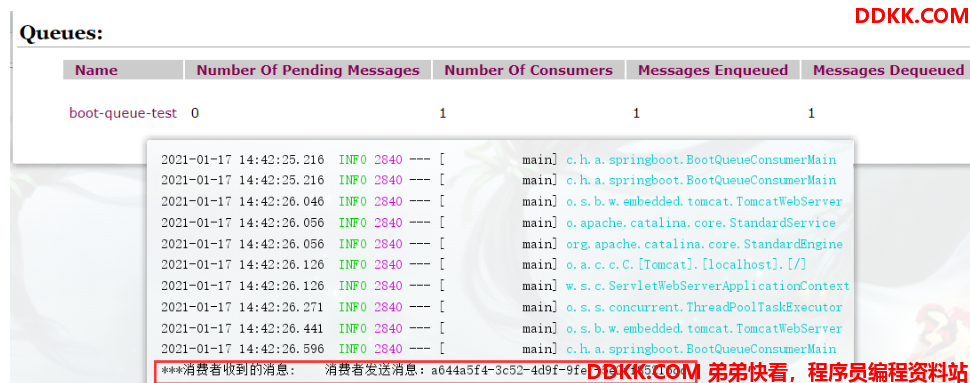
启动消费者服务,接受到了之前生产者生产的消息,测试结果如下:

定时任务发送消息
1、 开启主启动类;
@SpringBootApplication
@EnableScheduling      // 是否开启
public class MainApp_Produce {
    public static void main(String[] args) {
        SpringApplication.run(MainApp_Produce.class,args);
    }
}

2、 使用注解@Scheduled;
// 带定时投递的业务方法
    @Scheduled(fixedDelay = 3000)    // 每3秒自动调用
    public void produceMessageScheduled(){
        jmsMessagingTemplate.convertAndSend(queue,"** scheduled **"+ UUID.randomUUID().toString().substring(0,6));
        System.out.println("  produceMessage  send   ok   ");
    }
主题代码
主题订阅者服务
package com.huazai.activemq.springboot.topic;
import org.springframework.beans.factory.annotation.Autowired;
import org.springframework.jms.core.JmsMessagingTemplate;
import org.springframework.scheduling.annotation.Scheduled;
import org.springframework.stereotype.Service;
import javax.jms.Topic;
import java.util.UUID;
/**
 * @author DDKK.COM 弟弟快看,程序员编程资料站
 * @date 2022/1/17 15:14
 */
@Service
public class TopicProviderService {
    @Autowired
    private JmsMessagingTemplate jmsMessagingTemplate;
    @Autowired
    private Topic topic;
    /**
     * 每隔3秒定时发布主题消息
     */
    @Scheduled(fixedDelay = 3000)
    public void productTopic() {
        jmsMessagingTemplate.convertAndSend(topic, "发布者发布主题消息:" + UUID.randomUUID());
    }
}
主题发布者服务
package com.huazai.activemq.springboot.topic;
import org.springframework.jms.annotation.JmsListener;
import org.springframework.stereotype.Service;
import javax.jms.JMSException;
import javax.jms.TextMessage;
/**
 * @author DDKK.COM 弟弟快看,程序员编程资料站
 * @date 2022/1/17 15:15
 */
@Service
public class TopicConsumerService {
    /**
     * 开启监听器监听主题消息
     *
     * @param textMessage
     * @throws JMSException
     */
    @JmsListener(destination = "${topic.name}")
    public void receive(TextMessage textMessage) throws JMSException {
        String text = textMessage.getText();
        System.out.println("订阅者订阅到的消息:" + text);
    }
}
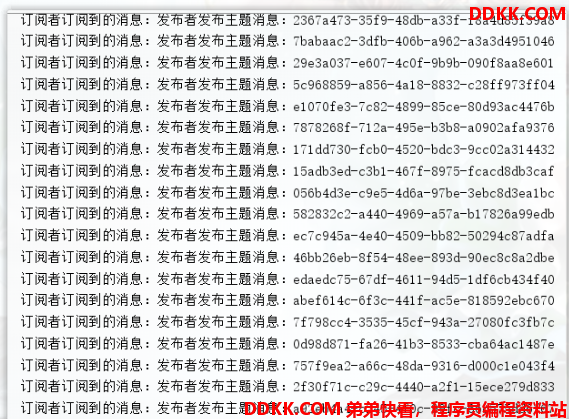
先启动主题订阅者,再启动主题发布者,主题订阅者会间隔3秒接收到主题发布者的消息,结果如下:

