前言
通过kubectl能够对K8S资源进行各种管理,但是操作起来不太方便,K8S提供了声明式的资源管理,即通过编写YML/JSON文件来管理。
资源分类:
1、 名称空间级别(工作负载:Pod,Rs,Job…服务发现及负载均衡:service,ingress…配置及存储:Volume,CSI…特殊类型存储:configmap,secret…);
2、 集群级别(namespace,node,role…);
3、 元数据级别(Hpa,podTemplate…);
查看
# 查看pod
kubectl get pods  -n test
# 查看pod资源清单
kubectl get pods  test-nginx-cc44fcc54-cdlh9 -o yaml -n test
# 查看svc
kubectl get svc -n test
# 查看svc资源清单
kubectl get svc test-nginx -o yaml -n test
# 查看svc下metadata解释文档
kubectl explain svc.metadata
部署nginx
1、 添加pod;
# 编写pod配置清单
vim nginx-pod.yaml
# k8sAPI版本
apiVersion: v1
# 资源类型
kind: Pod
# 元数据对象
metadata:
 元数据对象名称
 name: nginx-pod
 元数据对象命名空间
 namespace: test
 资源标签
 labels:
  app: nginx
 自定义注解列表
annotations:
   自定义注解名字
 name: test-annotation001
spec:
 容器重启策越,默认Always表示一旦不管以何种方式终止运行都将重启,OnFailure表示只有Pod以非0退出码退出才重启,Nerver表示不再重启该Pod
 restartPolicy: Never
 节点选择器,需先给节点定义标签
 nodeSelector:
  node: work001
 pull镜像时使用secret名称
 imagePullSecrets:
 是否使用主机网络模式,默认false,设置为true时,不适用docker网桥
 hostNetwork:
 容器相关
 containers:
   容器名
 - name: nginx
   使用镜像
   image: daocloud.io/library/nginx:1.7.11
   镜像拉取策略,默认Always,每次都尝试拉取镜像,Never表示仅使用本地镜像,IfnotPresent表示优先使用本地镜像,否则下载镜像
   imagePullPolicy: Always
   容器启动命令,数组可指定多个,不指定使用打包时的启动命令
   command: [string]
   容器启动命令参数,数组可指定多个
   args: [string]
   容器的工作目录
   workingDir: string
   指定容器内部存储卷配置
  volumeMounts:
   存储卷名称
  - name: nfs
     挂载路径
    mountPath:  "/usr/share/nginx/html"
     是否为只读模式
    readOnly: true
   容器暴露的端口列表
   ports:
     端口号名称
   - name: nginx-port
     监听端口号
     containerPort: 80
     容器所在主机需要监听的端口号,默认与Container相同,如果设置了,同一个主机将不同启动相同副本,会端口冲突
    hostPort: 80
     端口协议,支持TCP和UDP,默认TCP
     protocol: TCP
   容器运行前需设置的环境变量列表,name-变量名称,value-变量值
  env:
  - name:
  - value:
   资源限制
   resources:
    设置容器运行时资源上限
    limits:
     CPU核数,两种方式,浮点数或者是整数+m,0.1=100m,最少值为0.001核(1m)
     cpu: 1
     内存限制
     memory: 100M
    容器启动和调度时的限制设置
    requests:
     cpu: 1
     memory: 100M
   健康检查,当探测无响应几次后将自动重启该容器,检查方法有exec、httpGet和tcpSocket
  livenessProbe:
# 创建
kubectl create -f nginx-deployment.yaml
1、 添加service;
# 编写service资源清单
vim nginx-service.yaml
# api版本
apiVersion: v1
# 资源类型
kind: Service
# 元数据
metadata:
  labels:
    app: nginx-service
  name: nginx-service
  命名空间,默认为default
  namespace: test
spec:
  Service需要暴露的端口列表
  ports:
    服务监听的端口号
  - port: 80
    端口名称
    name: nginx-port
    端口协议,支持TCP和UDP,默认值为TCP
    protocol: TCP
    需要转发到后端Pod的端口号
    targetPort: 80
    NodePort时指定映射到物理机的端口号
    nodePort: 30000
  选择器配置,将选择具有指定标签的Pod作为管理范围
  selector:
    app: nginx
  Service的类型,默认值为ClusterIP:虚拟服务的IP;NodePort:使用宿主机的端口;LoadBalancer:使用外接负载均衡器完成到服务的负载分发
  type: NodePort
# 创建
kubectl create -f nginx-service.yaml
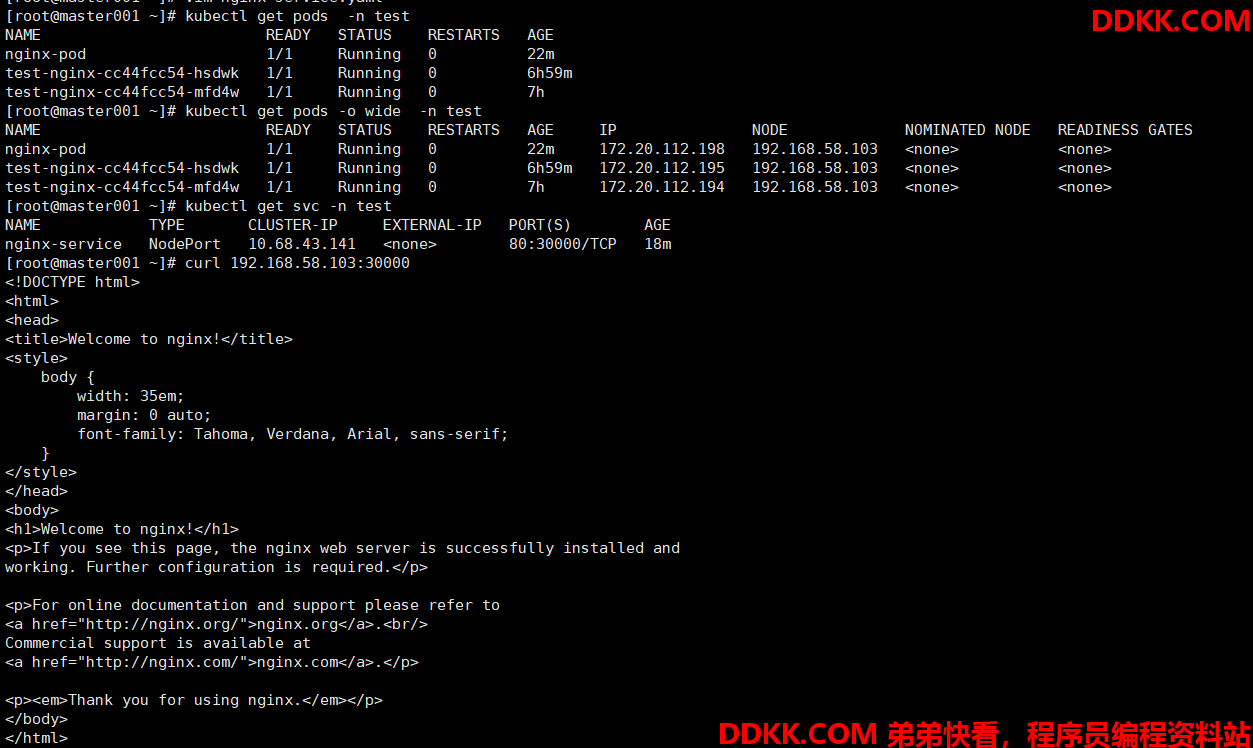
1、 部署都可通过work001节点的ip+30000访问nginx首页地址;

修改
修改外部访问端口为31000
# 离线修改
vim nginx-service.yaml
# 生效
kubectl apply -f nginx-service.yaml

修改外部访问端口为32000
# 在线修改
kubectl edit service nginx-service -n test


删除
# 陈述式删除
kubectl delete service nginx-service -n test
# 声明式删除
kubectl delete -f nginx-pod.yaml
kubectl delete -f nginx-service.yaml