测试
-
少DEBUG,多Testing
-
go语言采用表格驱动测试
-
分离的测试数据和测试逻辑
-
明确的出错信息
-
可以部分失败
-
go语言的语法使得我们更容易实践表格驱动测试
// 如果要测试add函数,那么文件名就叫做add_test.go
// 测试方法名字就叫做TestAdd
package main
import "testing"
func add(a, b int) int {
	return a + b
}
func TestAdd(t *testing.T) {
	tests := []struct{
      a, b, c int }{
		{
     3, 4, 7},
		{
     1, 2, 3},
		{
     4, 5, 1}, //模拟出错
		{
     1, 1, 1}, // 模拟出错
	}
	for _, tt := range tests {
		if actual := add(tt.a, tt.b); actual != tt.c {
			t.Errorf("%d + %d got %d ;expected %d ", tt.a, tt.b, tt.c, actual)
		}
	}
}
- 控制台
GOROOT=/usr/local/gogosetup
GOPATH=/Users/xiao_xiaoxiao/gogosetup
/usr/local/go/bin/go test -c -o /private/var/folders/db/mpycn34j5534hjnxy33y6h9m0000gn/T/___TestAdd_in_learn2_testing learn2/testinggosetup
/usr/local/go/bin/go tool test2json -t /private/var/folders/db/mpycn34j5534hjnxy33y6h9m0000gn/T/___TestAdd_in_learn2_testing -test.v -test.run ^TestAdd$gosetup
=== RUN   TestAdd
    TestAdd: add_test.go:19: 4 + 5 got 1 ;expected 9
    TestAdd: add_test.go:19: 1 + 1 got 1 ;expected 2
--- FAIL: TestAdd (0.00s)
FAIL
用命令行测试
- 在当前目录下使用go test命令
不通过

通过

代码覆盖率
- go语言可以检测代码覆盖率
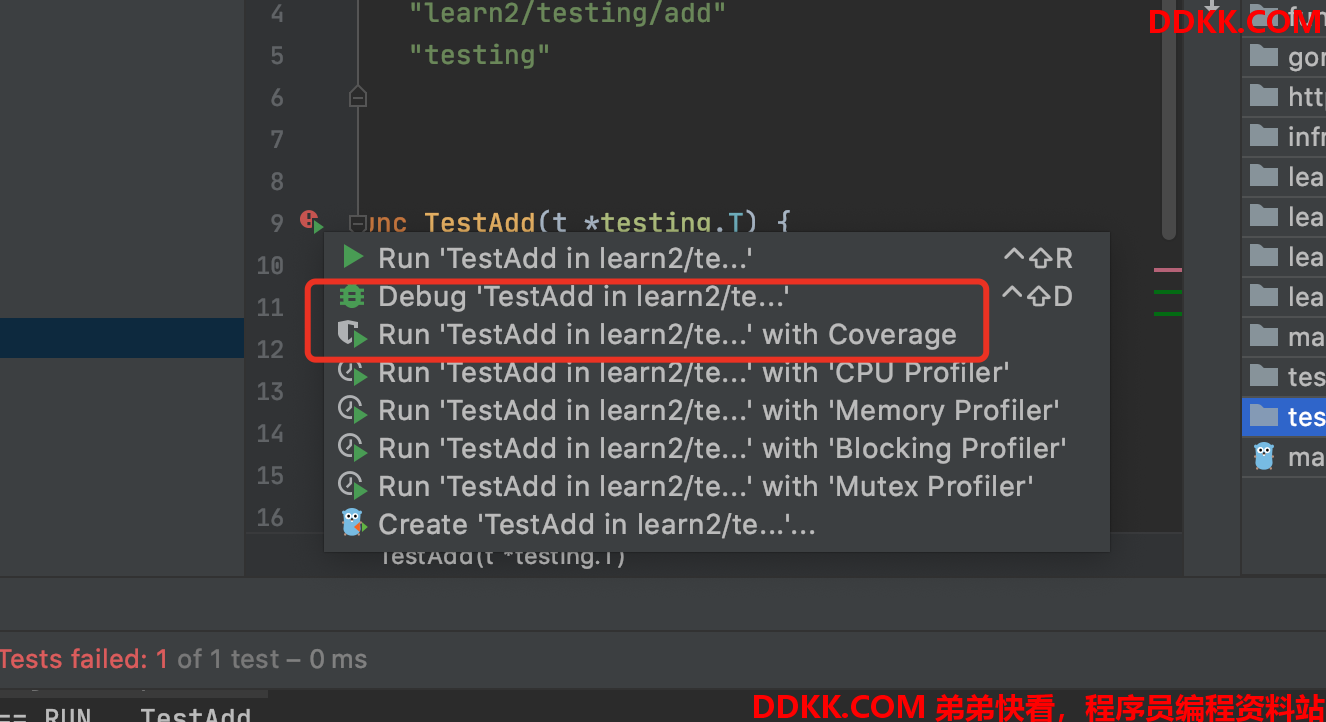

这个项目里面的代码都会统计覆盖率
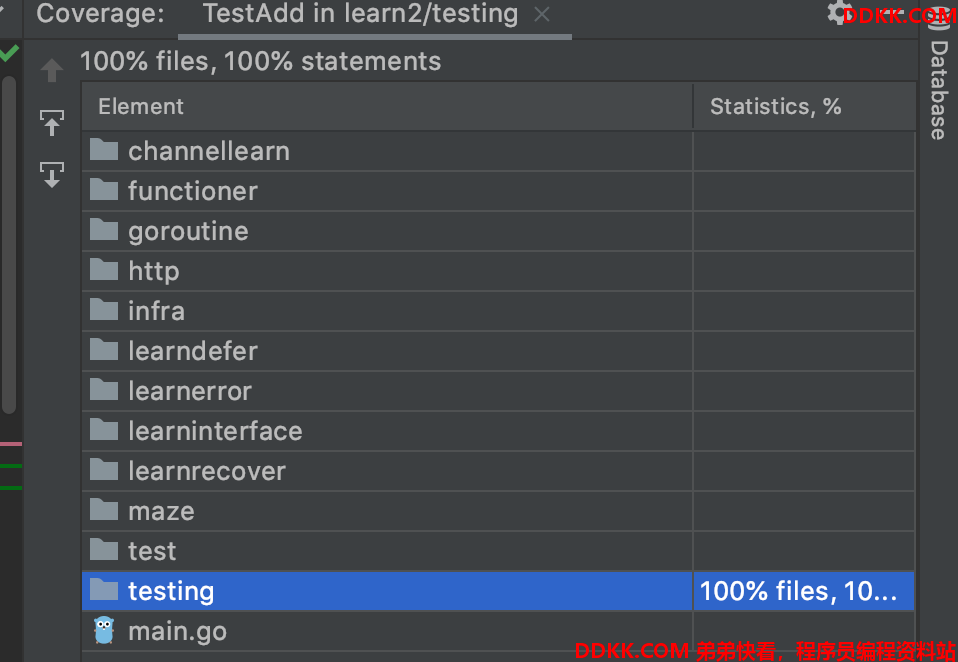
用命令行操作
- go test -coverprofile=c.out 生成文件
- go tool cover -html=c.out 页面观看覆盖率
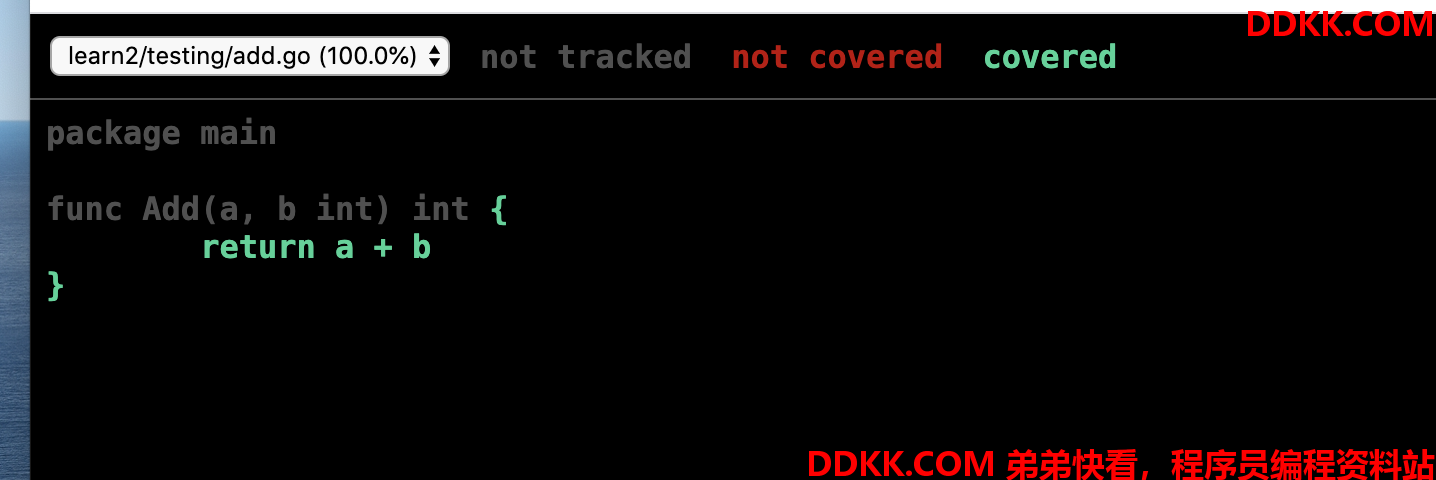
- 注意: test文件要和逻辑代码在同一个包中 不然显示不出来
性能测试
// BenchmarkXxx testing.B
func BenchmarkAdd(b *testing.B) {
	a, j, c := 1, 2, 3 //一般性能测试选择最复杂的那个用例,
	// 如果在这里做测试用的数据的生成,不想把这个时间加进去,可以在生成数据之后reset一下时间
	b.ResetTimer()
	for i := 0; i < b.N; i++ {
      //性能测试一般循环多次,具体不用我们定,用b.N系统自动帮我们确定多少次
		actual := Add(a, j)
		if actual != c {
			b.Errorf("%d + %d got %d ;expected %d ", a, j, c, actual)
		}
	}
}
控制台
GOROOT=/usr/local/gogosetup
GOPATH=/Users/xiao_xiaoxiao/gogosetup
/usr/local/go/bin/go test -c -o /private/var/folders/db/mpycn34j5534hjnxy33y6h9m0000gn/T/___BenchmarkAdd_in_learn2_testing learn2/testinggosetup
/private/var/folders/db/mpycn34j5534hjnxy33y6h9m0000gn/T/___BenchmarkAdd_in_learn2_testing -test.v -test.bench ^BenchmarkAdd$ -test.run ^$gosetup
goos: darwin
goarch: amd64
pkg: learn2/testing
BenchmarkAdd
# 100000000次    每次操作  0.512 ns
BenchmarkAdd-4   	1000000000	         0.512 ns/op
PASS
用命令行
gotest -bench .
性能调优
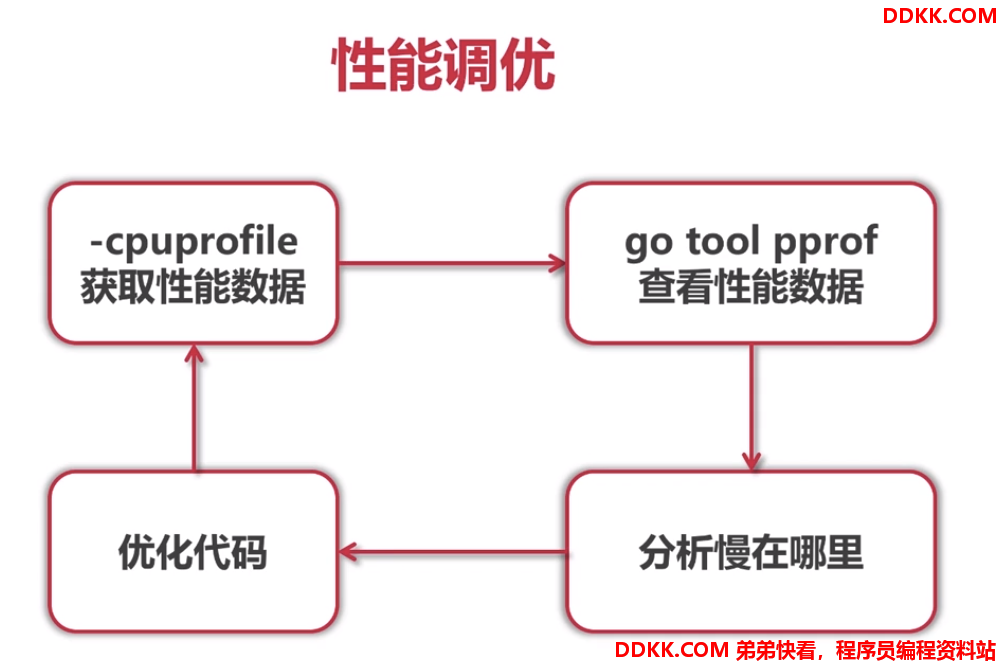
- go test -bench . -cpuprofile=cpu.out生成二进制文件
- 用pprof查看这个二进制文件go tool pprof cpu.out:进入pprof环境
- 进入pprof环境之后,使用web命令生成图(要先安装graphviz工具)
- 这张图会告诉你时间消耗在哪个地方,箭头越粗,方框越大越耗时
(大概长这样,我的用例太简单了,所以截图了其他的用例的图)

- 然后通过看这张图,看哪里可以优化,优化完再次运行,然后不断优化到满意为止
http测试
- 分为2种,一种是测试这个函数是否正确,虚构http请求的request和response,然后测试函数对各种返回是否正常,第二种是测试服务器是否正常,构造一个server,然后通过通信,看看是否正常
package main
import (
	"errors"
	"fmt"
	"io/ioutil"
	"net/http"
	"net/http/httptest"
	"os"
	"strings"
	"testing"
)
// 测试errWrapper
// 入参是appHandler  :::type appHandler func(writer http.ResponseWriter, request *http.Request) error
// func errWrapper(handler appHandler) func(http.ResponseWriter, *http.Request) {
// }
// ******************* 入参构造 ***********************//
// 模拟抛出错误
func errPanic(_ http.ResponseWriter, _ *http.Request) error {
	panic(123)
}
type testingUserError string
func (e testingUserError) Error() string {
	return e.Message()
}
func (e testingUserError) Message() string {
	return string(e)
}
// 模拟用户错误
func errUserError(_ http.ResponseWriter, _ *http.Request) error {
	return testingUserError("user error")
}
//模拟。。。
func errNotFound(_ http.ResponseWriter, _ *http.Request) error {
	return os.ErrNotExist
}
func errNoPermission(_ http.ResponseWriter, _ *http.Request) error {
	return os.ErrPermission
}
func errUnknown(_ http.ResponseWriter, _ *http.Request) error {
	return errors.New("unknown error")
}
// 没有错误
func noError(writer http.ResponseWriter, _ *http.Request) error {
	fmt.Fprintln(writer, "no error")
	return nil
}
// 这个是 测试用例
var tests = []struct {
	h appHandler // 入参
	// 返回的信息
	code    int
	message string
}{
	{
     errPanic, 500, "Internal Server Error"},
	{
     errUserError, 400, "user error"},
	{
     errNotFound, 404, "Not Found"},
	{
     errNoPermission, 403, "Forbidden"},
	{
     errUnknown, 500, "Internal Server Error"},
	{
     noError, 200, "no error"},
}
//测试errWrapper
// 只是测试errWrapper这个函数
func TestErrWrapper(t *testing.T) {
	for _, tt := range tests {
		f := errWrapper(tt.h) //入参
		// httptest 可以虚构request 和 response
		// response  request 是 指针类型
		response := httptest.NewRecorder()
		request := httptest.NewRequest(http.MethodGet, "http://www.imooc.com", nil)
		f(response, request) // 执行
		verifyResponse(response.Result(), tt.code, tt.message, t)
	}
}
// 测试整个服务器是否正常,这个是真的发请求,
func TestErrWrapperInServer(t *testing.T) {
	for _, tt := range tests {
		f := errWrapper(tt.h)
		// 发请求 构造一个server
		server := httptest.NewServer(
			http.HandlerFunc(f)) // 传入处理函数
		resp, _ := http.Get(server.URL)
		verifyResponse(resp, tt.code, tt.message, t)
	}
}
// 判断 是否正确
func verifyResponse(resp *http.Response, expectedCode int, expectedMsg string, t *testing.T) {
	b, _ := ioutil.ReadAll(resp.Body)
	body := strings.Trim(string(b), "\n")
	if resp.StatusCode != expectedCode ||
		body != expectedMsg {
		t.Errorf("expect (%d, %s); "+
			"got (%d, %s)",
			expectedCode, expectedMsg,
			resp.StatusCode, body)
	}
}
生成文档和示例代码
文档
- go语言的文档生成用godoc
godoc命令要自己安装
- 第一种:直接在命令行查看
go doc 显示struct结构 和引入哪些包
# package queue // import "imooc.com/ccmouse/learngo/lang/queue"
# type Queue []int
go doc Push方法
#package queue // import "."
# func (q *Queue) Push(v int)
#     Pushes the element into the queue.
go doc Queue
# package queue // import "."
#type Queue []int
#    A FIFO queue.
#func (q *Queue) IsEmpty() bool
#func (q *Queue) Pop() int
#func (q *Queue) Push(v int)
go help doc
- 在页面中看
godoc -http :8080
注释#
- go文档的注释是可以随便写的
package queue
// A FIFO queue.
type Queue []int
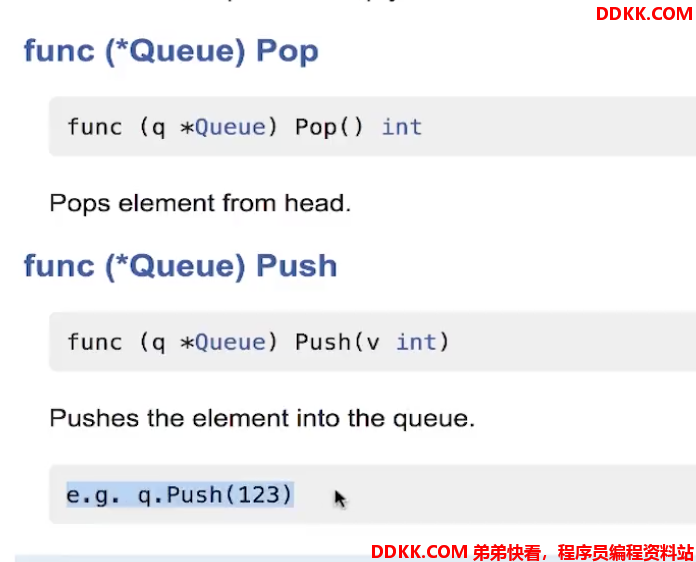
// Pushes the element into the queue. 注释会记录下来
// 		e.g. q.Push(123)   会缩进而且用框框框起来
func (q *Queue) Push(v int) {
	*q = append(*q, v)
}
// Pops element from head.
func (q *Queue) Pop() int {
	head := (*q)[0]
	*q = (*q)[1:]
	return head
}
// Returns if the queue is empty or not.
func (q *Queue) IsEmpty() bool {
	return len(*q) == 0
}
example
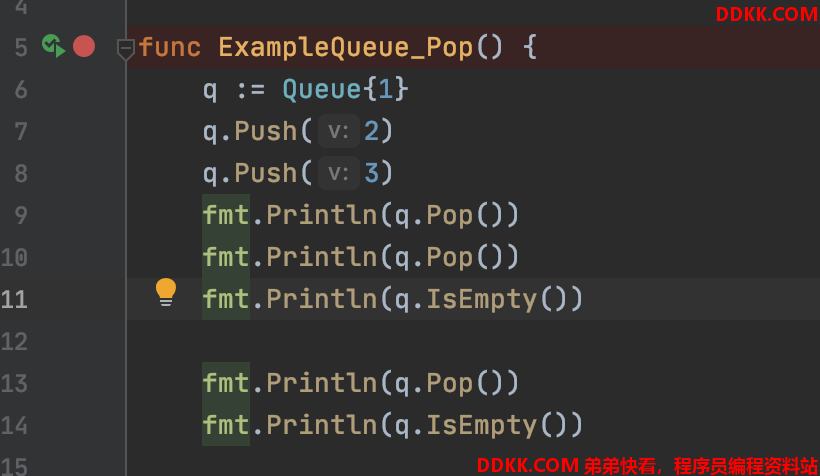
func ExampleQueue_Pop() {
	q := Queue{
     1}
	q.Push(2)
	q.Push(3)
	fmt.Println(q.Pop())
	fmt.Println(q.Pop())
	fmt.Println(q.IsEmpty())
	fmt.Println(q.Pop())
	fmt.Println(q.IsEmpty())
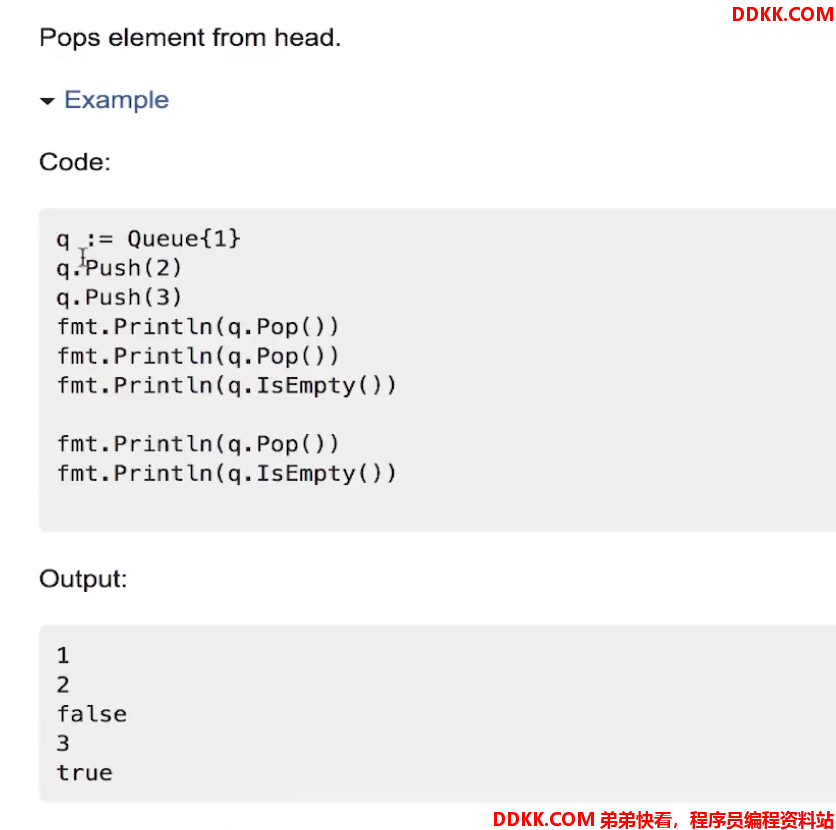
	// Output:
	// 1
	// 2
	// false
	// 3
	// true
}
格式正确的话是可以运行的,在代码中不要有多余的注释,不然运行不起来的
-生成文件
总结#
- 用注释写文档
- 在测试中加入Example
- 用go doc/godoc来查看/生成文档