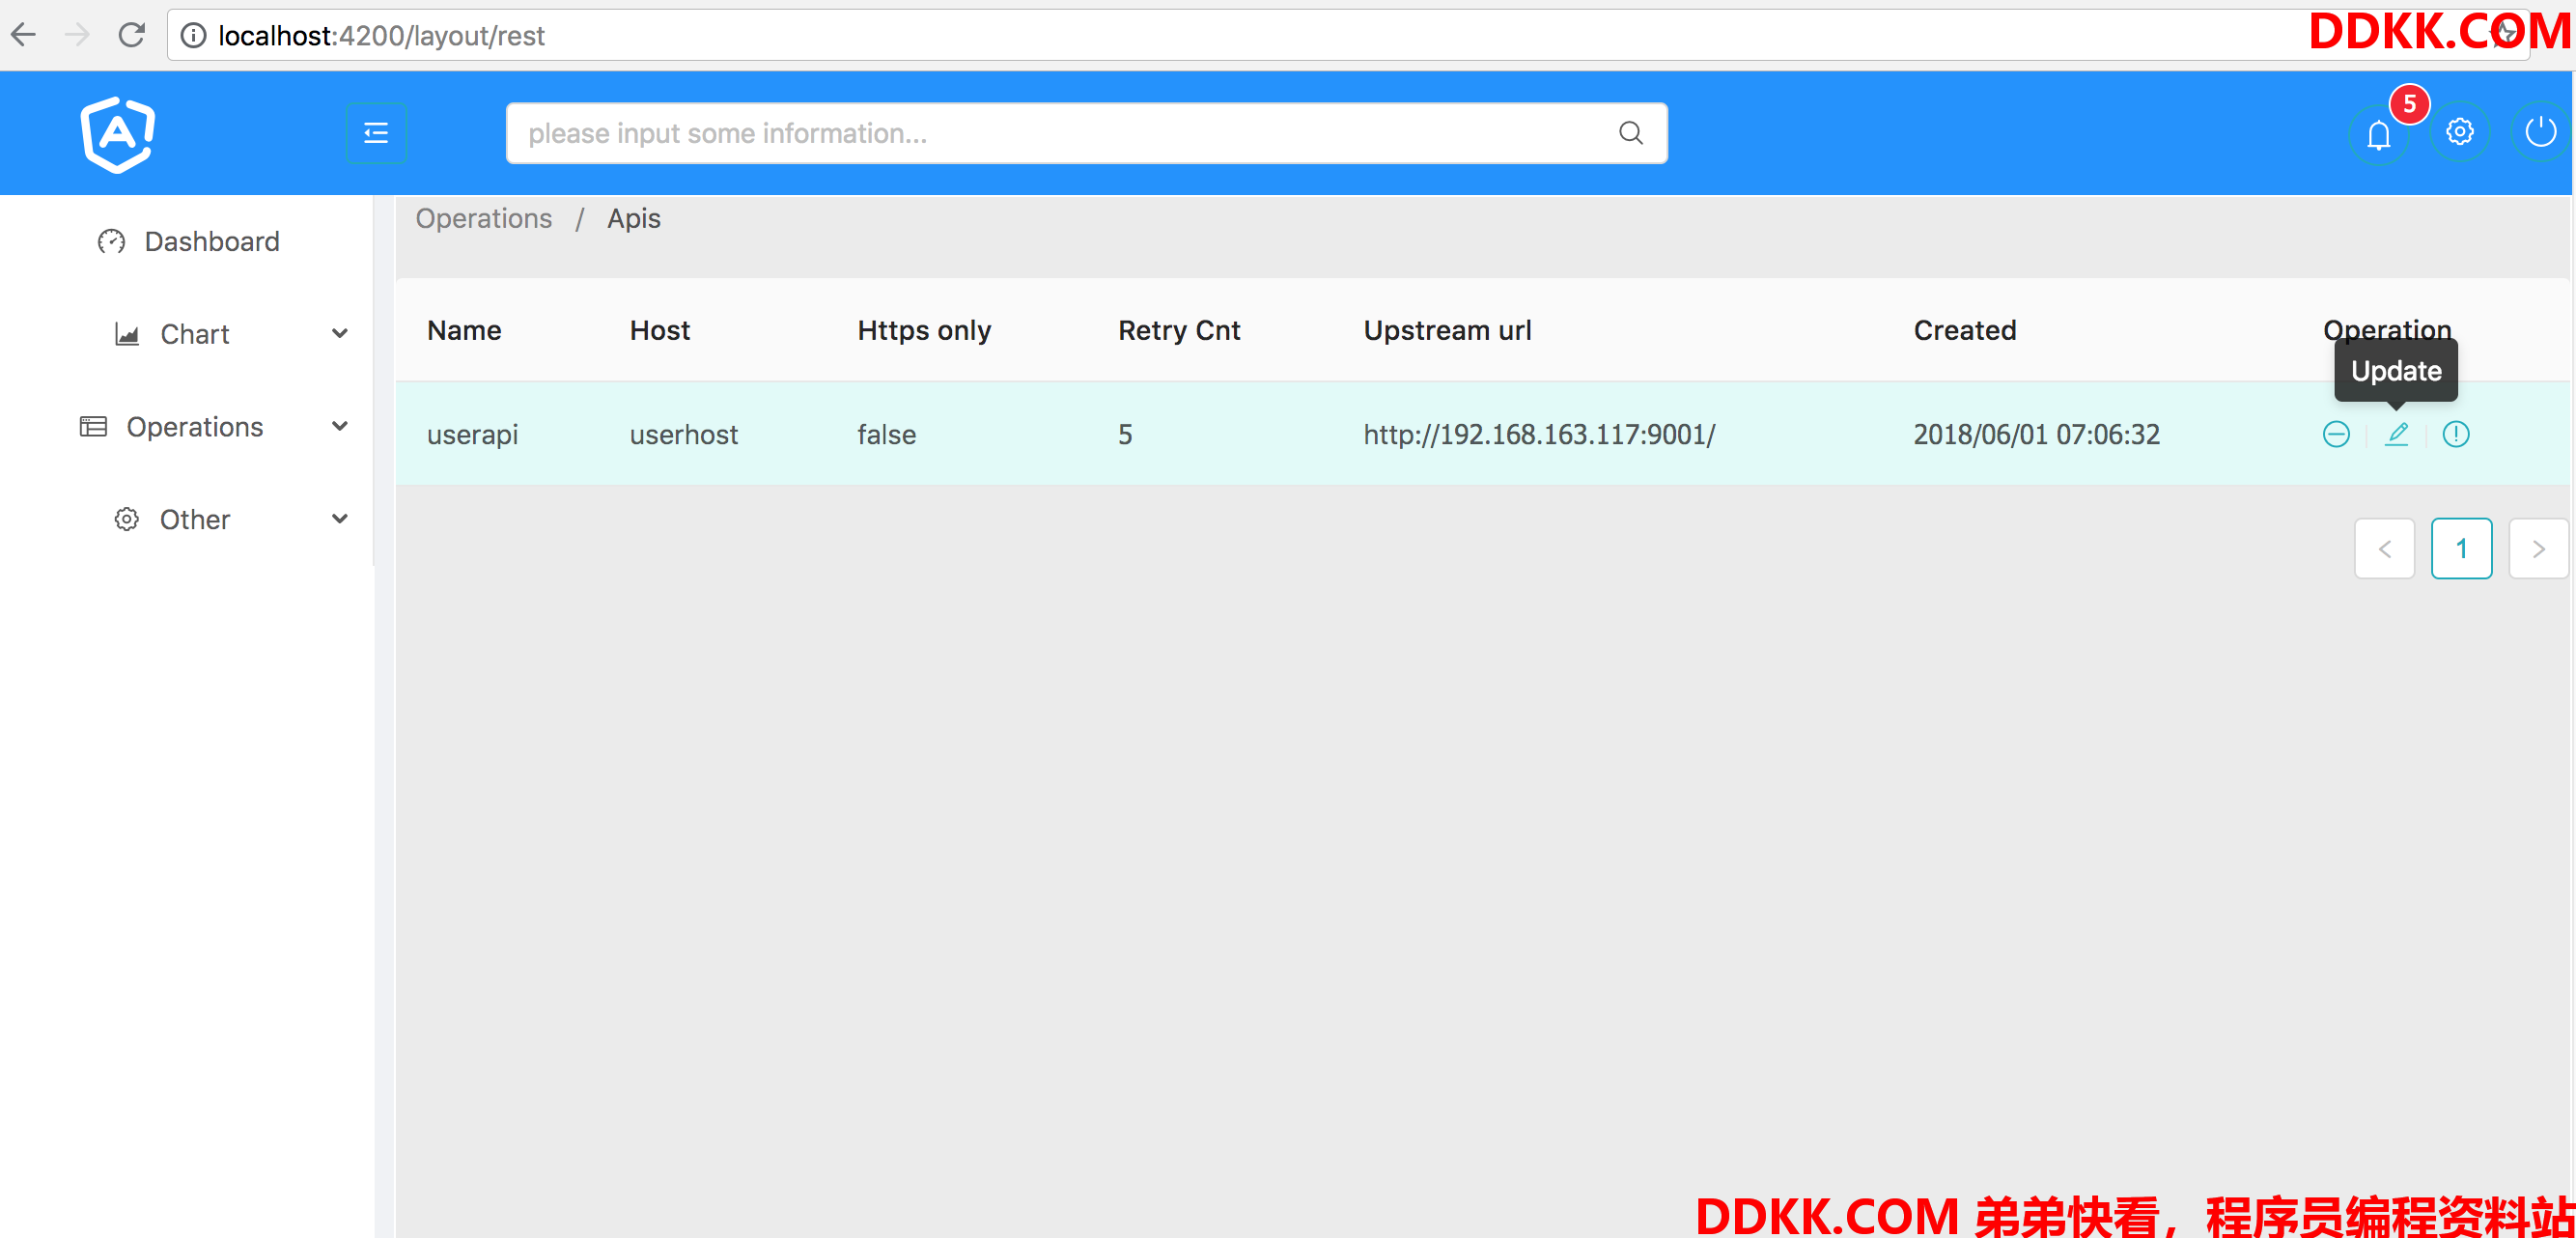
这篇文章来介绍一下如何进行前后端交互,一个常见的场景就是前端调用后端提供的restful api,进行增删改查,结合之前提到的新版本的http模块和rxjs,这篇文章首先使用kong搭建一个提供后端restful的api接口,对微服务的api增删改查进行处理,以实现api的简单管理。
事前准备
搭建kong,同时启动api服务,然后将此api注册到kong上,通过kong提供的查询的相关Rest Api进行查询
[root@kong ~]# curl http://127.0.0.1:8001/apis
{
    "total":1,"data":[{
    "created_at":1527809237323,"strip_uri":true,"id":"5f41ad1d-f9b2-4dc7-98fc-fc003ec366bb","hosts":["userhost"],"name":"userapi","http_if_terminated":false,"https_only":false,"retries":5,"preserve_host":false,"upstream_connect_timeout":60000,"upstream_read_timeout":60000,"upstream_send_timeout":60000,"upstream_url":"http:\/\/192.168.163.117:9001\/"}]}
[root@kong ~]#
详细可参看如下文章进行后端服务的设定,觉得麻烦的话也可以使用手头的任何后端或者模拟的后端服务均可。
https://blog.csdn.net/liumiaocn/article/details/80466616
设定proxy
在根目录下创建proxy.conf.json,因为牵扯到跨域访问,这里使用在angular中最为简单的本地开发环境的设定方式之一,通过这个配置文件设定诸如nginx可以实现的反向代理的功能,内容如下
{
  "/api": {
    "target": "http://127.0.0.1:8001",
    "secure": false,
    "logLevel": "debug"
  }
}
注意此处是demo用的,实际环境的时候一般为设定nginx,这样会根据url进行匹配,因为kong的api直接是在/下,往往会出现对其他页面的路由产生影响,可以将logLevel打开以确认状况
修改pacakge.json中的npm start命令,加载上述配置信息文件,修改为:
"start": "ng serve --proxy-config proxy.conf.json",
请注意,静态信息的修改需要重新执行start命令才行,因为proxy-config就是一个转发功能的开发环境集成,如果使用nginx的直接使用bypass等即可。
创建用于demo的组件
liumiaocn:content-module liumiao$ ls
content-module.module.spec.ts content-module.module.ts      f2-demo                       g2-demo
liumiaocn:content-module liumiao$ ng generate component rest-demo
CREATE src/app/default-layout/content-module/rest-demo/rest-demo.component.css (0 bytes)
CREATE src/app/default-layout/content-module/rest-demo/rest-demo.component.html (28 bytes)
CREATE src/app/default-layout/content-module/rest-demo/rest-demo.component.spec.ts (643 bytes)
CREATE src/app/default-layout/content-module/rest-demo/rest-demo.component.ts (280 bytes)
UPDATE src/app/default-layout/content-module/content-module.module.ts (633 bytes)
liumiaocn:content-module liumiao$
添加子路由信息
    path: 'layout',
    component: DefaultLayoutComponent,
    children: [
      {
        path: 'g2',
        component: G2DemoComponent
      },
      {
        path: 'f2',
        component: F2DemoComponent
      },
      {
        path: 'rest',
        component: RestDemoComponent
      },
    ]
添加routerlink信息
在左侧菜单中添加如下routerlink信息
<li nz-menu-item><a routerLink="/layout/rest" routerLinkActive="active">Apis</a></li>
css布局
这个系列的教程基于由后端转的前端,或者有后端基础的的,本着能不动css就不动的原则,这里仅仅调整一下 面包屑的对齐方式和边距。
liumiaocn:rest-demo liumiao$ cat rest-demo.component.css
.ant-breadcrumb{
  text-align: left;
  margin-left: 10px;
}
liumiaocn:rest-demo liumiao$
html模版
这里只需要注意几点最为基础的:
- 日期的转换使用管道方式进行设置
- nzTable的数据的设定以及绑定的名称
- 这里没有判空,实际项目中判空等基本事项都不可或缺
liumiaocn:rest-demo liumiao$ cat rest-demo.component.html
<nz-breadcrumb>
  <nz-breadcrumb-item>Operations</nz-breadcrumb-item>
  <nz-breadcrumb-item>Apis</nz-breadcrumb-item>
</nz-breadcrumb>
<br>
<nz-tabledataSource [nzData]="dataModel">
  <thead>
  <tr>
    <th>Name</th>
    <th>Host</th>
    <th>Https only</th>
    <th>Retry Cnt</th>
    <th>Upstream url</th>
    <th>Created</th>
    <th>Operation</th>
  </tr>
  </thead>
  <tbody>
  <tr *ngFor="let data of dataSource.data">
    <td>{
     {
     data.name}}</td>
    <td>{
     {
     data.hosts}}</td>
    <td>{
     {
     data.https_only}}</td>
    <td>{
     {
     data.retries}}</td>
    <td>{
     {
     data.upstream_url}}</td>
    <td>{
     {
     data.created_at | date:'yyyy/MM/dd HH:MM:SS'}}</td>
    <td>
      <a nz-tooltip nzTitle="Delete"><i class="anticon anticon-minus-circle-o"></i></a>
      <nz-divider nzType="vertical">|</nz-divider>
      <a nz-tooltip nzTitle="Update"><i class="anticon anticon-edit"></i></a>
      <nz-divider nzType="vertical">|</nz-divider>
      <a nz-tooltip nzTitle="Retrieve"><i class="anticon anticon-exclamation-circle-o"></i></a>
    </td>
  </tr>
  </tbody>
</nz-table>
liumiaocn:rest-demo liumiao$
rest-demo.component.ts
代码说明:
可以看到目前的代码非常简单,只是使用HttpClient的get方法,然后将数据读到ApiModel的这样一个类似bean中,然后通过dataModel与页面的Table进行绑定显示。
liumiaocn:rest-demo liumiao$ cat rest-demo.component.ts
import { Component, OnInit } from '@angular/core';
import { HttpClient } from '@angular/common/http';
import {Observable} from 'rxjs';
export class ApiModel {
  created_at: string;
  strip_uri: boolean;
  id: string;
  hosts: [''];
  name: string;
  http_if_terminated: boolean;
  https_only: boolean;
  retries: number;
  preserve_host: boolean;
  upstream_connect_timeout: number;
  upstream_read_timeout: number;
  upstream_send_timeout: number;
  upstream_url: string;
}
@Component({
  selector: 'app-rest-demo',
  templateUrl: './rest-demo.component.html',
  styleUrls: ['./rest-demo.component.css']
})
export class RestDemoComponent implements OnInit {
  dataModel = [];
  constructor(private http: HttpClient) { }
  ngOnInit() {
    this._getApis();
  }
  _getApis() {
    this.http.get('/apis').subscribe(
      item => {
        this.dataModel = item['data'];
      }
    );
  }
}
liumiaocn:rest-demo liumiao$
结果显示

总结
这篇文章设定了用于交互的后端环境,并生成了一个用于demo的组件,使用get方法取得了kong中预先注册了的api列表信息(预先准备的数据仅有一条)。下篇文章来继续了解一下增删改的使用方式。