1. Hadoop部署
1.1. 集群部署规划
注意:NameNode和SecondaryNameNode不要安装在同一台服务器
注意:ResourceManager也很消耗内存,不要和NameNode、SecondaryNameNode配置在同一台机器上。
| bigdata1 | bigdata2 | bigdata3 | |
| HDFS | NameNode DataNode |
DataNode | SecondaryNameNode DataNode |
| YARN | NodeManager | ResourceManager NodeManager |
NodeManager |
1.2. 上传安装包到opt目录下面的software文件夹下面

1.3. 解压安装包
# 解压安装包
cd /opt/software/
tar -zxvf hadoop-3.1.3.tar.gz -C /opt/module/
# 配置软连接
ln -s /opt/module/hadoop-3.1.3/ /opt/module/hadoop

1.4. 配置Hadoop环境变量
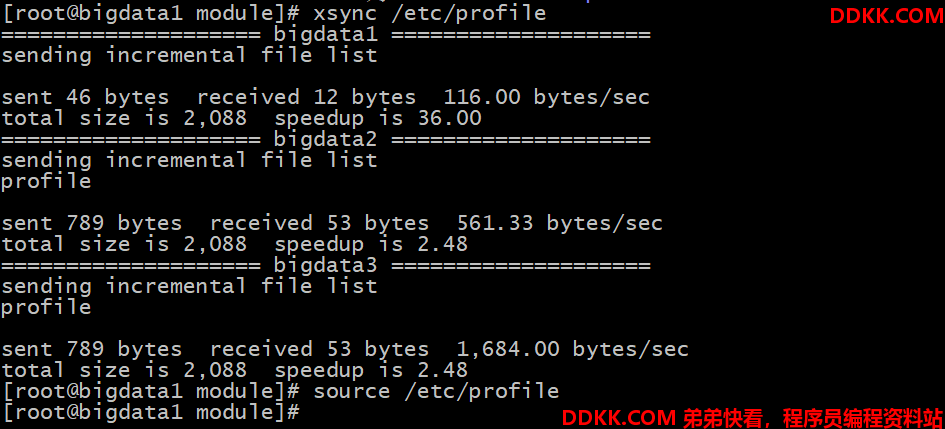
编辑/etc/profile 文件,在其中添加hadoop环境变量,并对环境变量文件进行分发
# 编辑 /etc/profile
vim /etc/profile
# 添加如下配置
## HADOOP_HOME
export HADOOP_HOME=/opt/module/hadoop
export PATH=$PATH:$HADOOP_HOME/bin
export PATH=$PATH:$HADOOP_HOME/sbin
# 保存后退出
:wq
# 分发环境变量文件
xsync /etc/profile
# 在所有机器下source环境变量
source /etc/profile
2. 配置集群
2.1. 核心配置文件
配置core-site.xml
<?xml version="1.0" encoding="UTF-8"?>
<?xml-stylesheet type="text/xsl" href="configuration.xsl"?>
<!--
  Licensed under the Apache License, Version 2.0 (the "License");
  you may not use this file except in compliance with the License.
  You may obtain a copy of the License at
    http://www.apache.org/licenses/LICENSE-2.0
  Unless required by applicable law or agreed to in writing, software
  distributed under the License is distributed on an "AS IS" BASIS,
  WITHOUT WARRANTIES OR CONDITIONS OF ANY KIND, either express or implied.
  See the License for the specific language governing permissions and
  limitations under the License. See accompanying LICENSE file.
-->
<!-- Put site-specific property overrides in this file. -->
<configuration>
    <!-- 指定NameNode的地址 -->
    <property>
        <name>fs.defaultFS</name>
        <value>hdfs://bigdata1:8020</value>
    </property>
    <!-- 指定hadoop数据的存储目录 -->
    <property>
        <name>hadoop.tmp.dir</name>
        <value>/opt/module/hadoop/data</value>
    </property>
    <!-- 配置HDFS网页登录使用的静态用户为root -->
    <property>
        <name>hadoop.http.staticuser.user</name>
        <value>root</value>
    </property>
</configuration>
2.2. HDFS配置文件
配置hdfs-site.xml
<?xml version="1.0" encoding="UTF-8"?>
<?xml-stylesheet type="text/xsl" href="configuration.xsl"?>
<!--
  Licensed under the Apache License, Version 2.0 (the "License");
  you may not use this file except in compliance with the License.
  You may obtain a copy of the License at
    http://www.apache.org/licenses/LICENSE-2.0
  Unless required by applicable law or agreed to in writing, software
  distributed under the License is distributed on an "AS IS" BASIS,
  WITHOUT WARRANTIES OR CONDITIONS OF ANY KIND, either express or implied.
  See the License for the specific language governing permissions and
  limitations under the License. See accompanying LICENSE file.
-->
<!-- Put site-specific property overrides in this file. -->
<configuration>
    <!-- nn web端访问地址-->
    <property>
        <name>dfs.namenode.http-address</name>
        <value>bigdata1:9870</value>
    </property>
    <!-- 2nn web端访问地址-->
    <property>
        <name>dfs.namenode.secondary.http-address</name>
        <value>bigdata3:9868</value>
    </property>
    <!-- 测试环境指定HDFS副本的数量1 -->
    <property>
        <name>dfs.replication</name>
        <value>1</value>
    </property>
</configuration>
2.3. YARN配置文件
配置yarn-site.xml
<?xml version="1.0"?>
<!--
  Licensed under the Apache License, Version 2.0 (the "License");
  you may not use this file except in compliance with the License.
  You may obtain a copy of the License at
    http://www.apache.org/licenses/LICENSE-2.0
  Unless required by applicable law or agreed to in writing, software
  distributed under the License is distributed on an "AS IS" BASIS,
  WITHOUT WARRANTIES OR CONDITIONS OF ANY KIND, either express or implied.
  See the License for the specific language governing permissions and
  limitations under the License. See accompanying LICENSE file.
-->
<configuration>
    <!-- Site specific YARN configuration properties -->
    <!-- 指定MR走shuffle -->
    <property>
        <name>yarn.nodemanager.aux-services</name>
        <value>mapreduce_shuffle</value>
    </property>
    <!-- 指定ResourceManager的地址-->
    <property>
        <name>yarn.resourcemanager.hostname</name>
        <value>bigdata2</value>
    </property>
    <!-- 环境变量的继承 -->
    <property>
        <name>yarn.nodemanager.env-whitelist</name>
        <value>
            JAVA_HOME,HADOOP_COMMON_HOME,HADOOP_HDFS_HOME,HADOOP_CONF_DIR,CLASSPATH_PREPEND_DISTCACHE,HADOOP_YARN_HOME,HADOOP_MAPRED_HOME
        </value>
    </property>
    <!-- yarn容器允许分配的最大最小内存 -->
    <property>
        <name>yarn.scheduler.minimum-allocation-mb</name>
        <value>512</value>
    </property>
    <property>
        <name>yarn.scheduler.maximum-allocation-mb</name>
        <value>4096</value>
    </property>
    <!-- yarn容器允许管理的物理内存大小 -->
    <property>
        <name>yarn.nodemanager.resource.memory-mb</name>
        <value>4096</value>
    </property>
    <!-- 关闭yarn对虚拟内存的限制检查 -->
    <property>
        <name>yarn.nodemanager.vmem-check-enabled</name>
        <value>false</value>
    </property>
</configuration>
2.4. MapReduce配置文件
配置mapred-site.xml
<?xml version="1.0"?>
<?xml-stylesheet type="text/xsl" href="configuration.xsl"?>
<!--
  Licensed under the Apache License, Version 2.0 (the "License");
  you may not use this file except in compliance with the License.
  You may obtain a copy of the License at
    http://www.apache.org/licenses/LICENSE-2.0
  Unless required by applicable law or agreed to in writing, software
  distributed under the License is distributed on an "AS IS" BASIS,
  WITHOUT WARRANTIES OR CONDITIONS OF ANY KIND, either express or implied.
  See the License for the specific language governing permissions and
  limitations under the License. See accompanying LICENSE file.
-->
<!-- Put site-specific property overrides in this file. -->
<configuration>
    <!-- 指定MapReduce程序运行在Yarn上 -->
    <property>
        <name>mapreduce.framework.name</name>
        <value>yarn</value>
    </property>
</configuration>
2.5. 配置workers
配置workers
bigdata1
bigdata2
bigdata3
3. 配置历史服务器
在mapred-site.xml配置文件中增加如下配置
<!-- 历史服务器端地址 -->
<property>
    <name>mapreduce.jobhistory.address</name>
    <value>bigdata1:10020</value>
</property>
<!-- 历史服务器web端地址 -->
<property>
    <name>mapreduce.jobhistory.webapp.address</name>
    <value>bigdata1:19888</value>
</property>
4. 配置日志的聚集
日志聚集概念:应用运行完成以后,将程序运行日志信息上传到HDFS系统上。
日志聚集功能好处:可以方便的查看到程序运行详情,方便开发调试。
注意:开启日志聚集功能,需要重新启动NodeManager 、ResourceManager和HistoryManager。
开启日志聚集功能具体步骤如下,在yarn-site.xml文件中增加如下配置:
<!-- 开启日志聚集功能 -->
<property>
    <name>yarn.log-aggregation-enable</name>
    <value>true</value>
</property>
<!-- 设置日志聚集服务器地址 -->
<property>
    <name>yarn.log.server.url</name>
    <value>http://bigdata1:19888/jobhistory/logs</value>
</property>
<!-- 设置日志保留时间为7天 -->
<property>
    <name>yarn.log-aggregation.retain-seconds</name>
    <value>604800</value>
</property>
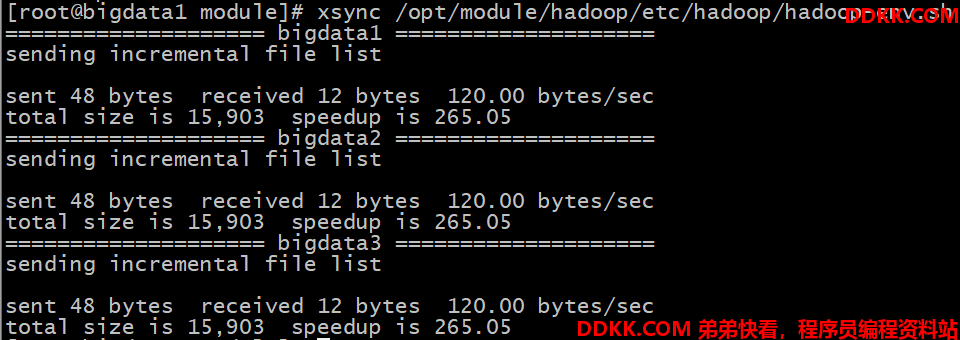
5. 分发Hadoop
将Hadoop集群通过脚本分发到其他机器上,分发脚本在博主的另一篇博客中有介绍:基于Centos7的集群分发脚本xsync
注意:执行脚本之前,要保证其他机器上有 /opt/module 目录
# hadoop文件和软连接都要发送过去(在 /opt/module 目录下执行如下命令)
xsync hadoop
xsync hadoop-3.1.3/
6. 群起集群
6.1. 格式化NameNode
如果集群是第一次启动,需要在hadoop102节点格式化NameNode(注意格式化之前,一定要先停止上次启动的所有namenode和datanode进程,然后再删除data和log数据)
# 因为配置了环境变量,执行如下命令即可(要在bigdata1机器上执行)
hdfs namenode -format
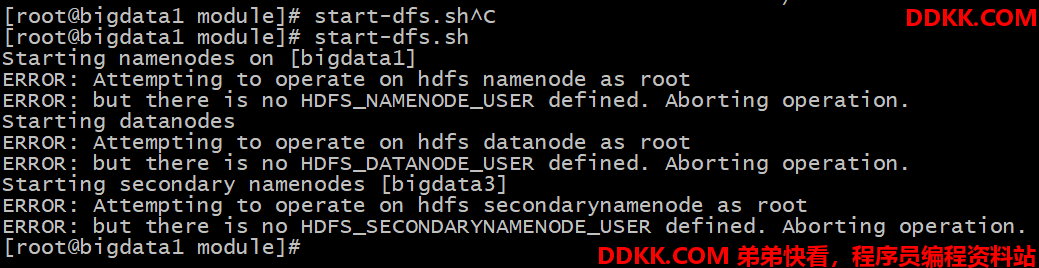
6.2. 启动HDFS
执行start-dfs.sh 命令即可
但是会发现会报如下错误
[root@bigdata1 module]# start-dfs.sh
Starting namenodes on [bigdata1]
ERROR: Attempting to operate on hdfs namenode as root
ERROR: but there is no HDFS_NAMENODE_USER defined. Aborting operation.
Starting datanodes
ERROR: Attempting to operate on hdfs datanode as root
ERROR: but there is no HDFS_DATANODE_USER defined. Aborting operation.
Starting secondary namenodes [bigdata3]
ERROR: Attempting to operate on hdfs secondarynamenode as root
ERROR: but there is no HDFS_SECONDARYNAMENODE_USER defined. Aborting operation.
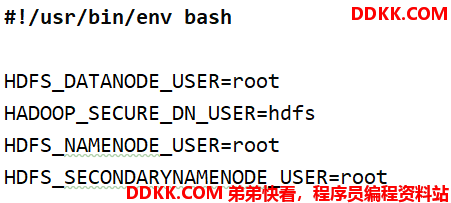
此时可以在 start-dfs.sh,stop-dfs.sh(在hadoop安装目录的sbin里)两个文件顶部添加以下参数
HDFS_DATANODE_USER=root
HADOOP_SECURE_DN_USER=hdfs
HDFS_NAMENODE_USER=root
HDFS_SECONDARYNAMENODE_USER=root
如下图:
再重新执行 start-dfs.sh 命令 ,重新启动
会发现报如下错误
[root@bigdata1 module]# start-dfs.sh
WARNING: HADOOP_SECURE_DN_USER has been replaced by HDFS_DATANODE_SECURE_USER. Using value of HADOOP_SECURE_DN_USER.
Starting namenodes on [bigdata1]
上一次登录:一 3月 28 20:08:26 CST 2022从 192.168.12.1pts/0 上
bigdata1: ERROR: JAVA_HOME is not set and could not be found.
Starting datanodes
上一次登录:一 3月 28 23:56:48 CST 2022pts/0 上
bigdata1: ERROR: JAVA_HOME is not set and could not be found.
bigdata2: ERROR: JAVA_HOME is not set and could not be found.
bigdata3: ERROR: JAVA_HOME is not set and could not be found.
Starting secondary namenodes [bigdata3]
上一次登录:一 3月 28 23:56:48 CST 2022pts/0 上
bigdata3: ERROR: JAVA_HOME is not set and could not be found.

此时可以在 hadoop-env.sh 配置文件中设置 hadoop和java 的环境变量,添加如下配置:
# 在该 HADOOP_HOME/etc/hadoop/hadoop-evn.sh 下修改添加如下配置
export JAVA_HOME=/usr/java/jdk1.8.0_181
export HADOOP_HOME=/opt/module/hadoop
如下图所示:

注意:这个配置文件要分发到所有机器上
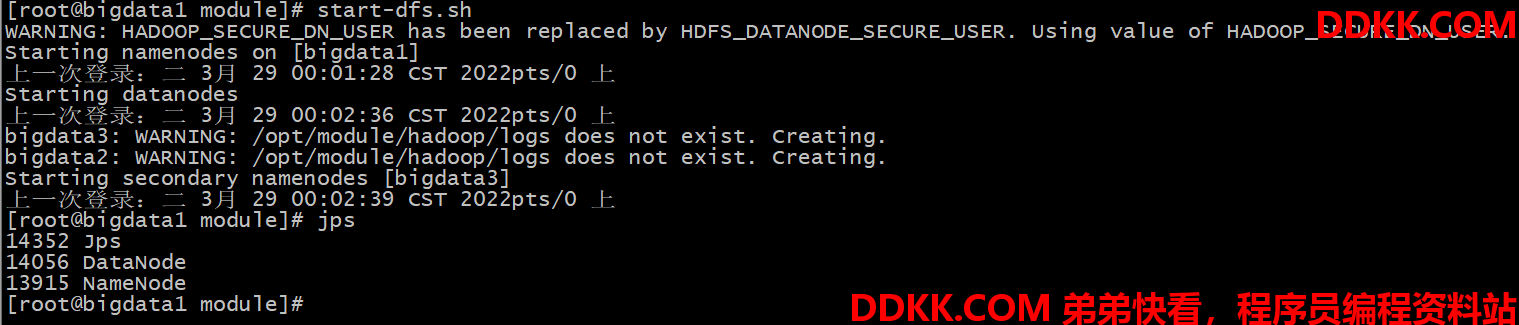
再重新执行 start-dfs.sh 命令 ,重新启动
此时发现启动成功,如下图所示:
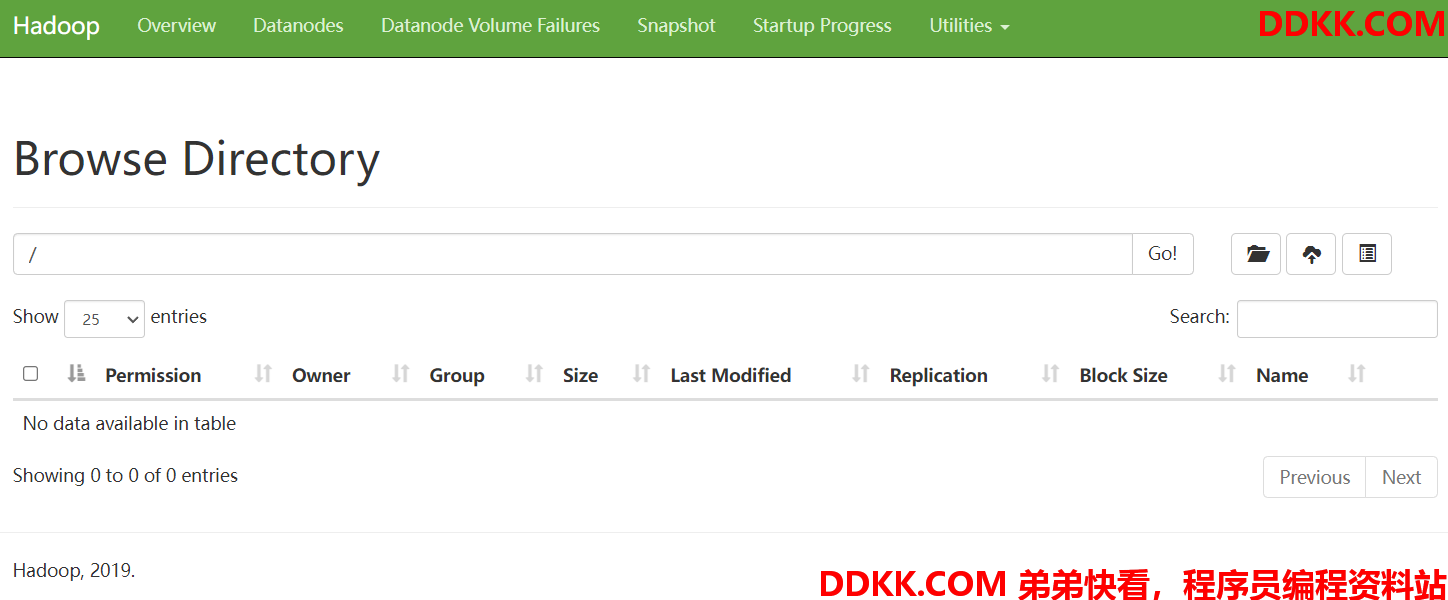
并通过web 页面查看HDFS,如下图所示:
http://bigdata1:9870/explorer.html#/
6.3. 启动YARN
需要在配置了ResourceManager的节点(bigdata2)上执行 start-yarn.sh 命令来启动yarn
同理,会报如下错误
[root@bigdata2 ~]# start-yarn.sh
Starting resourcemanager
ERROR: Attempting to operate on yarn resourcemanager as root
ERROR: but there is no YARN_RESOURCEMANAGER_USER defined. Aborting operation.
Starting nodemanagers
ERROR: Attempting to operate on yarn nodemanager as root
ERROR: but there is no YARN_NODEMANAGER_USER defined. Aborting operation.
如下图所示:

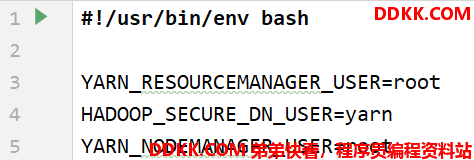
此时需要在 start-yarn.sh,stop-yarn.sh(在hadoop安装目录的sbin里)两个文件顶部添加以下参数
YARN_RESOURCEMANAGER_USER=root
HADOOP_SECURE_DN_USER=yarn
YARN_NODEMANAGER_USER=root
如下图:
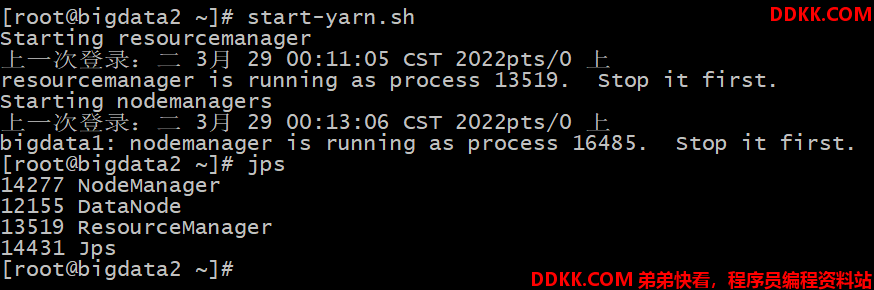
再重新执行 start-yarn.sh 命令 ,重新启动
此时发现启动成功,如下图所示(注意:需要配置bigdata2到其他机器的免密登录):
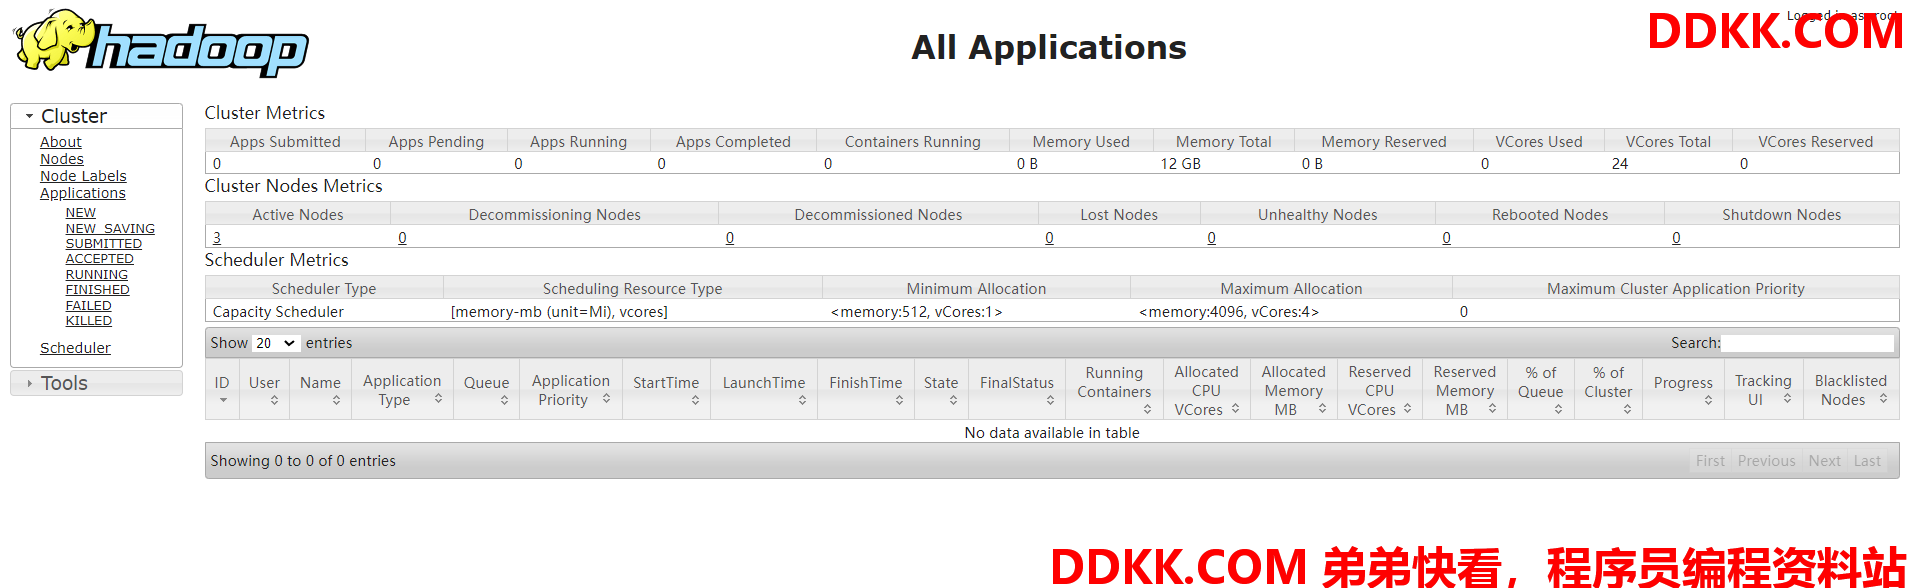
并通过web页面查看yarn,如下图所示:
6.4. 修复启动HDFS和YARN报错问题
当启动HDFS和YARN报错时,除了上述修复方式,还可以在 /opt/module/hadoop/etc/hadoop/hadoop-env.sh 文件中添加如下配置:
export HDFS_NAMENODE_USER=root
export HDFS_DATANODE_USER=root
export HDFS_SECONDARYNAMENODE_USER=root
export YARN_RESOURCEMANAGER_USER=root
export YARN_NODEMANAGER_USER=root
这个配置主要给什么用户授予什么权限,这是给root用户授予对应权限,这样就能正常启动了
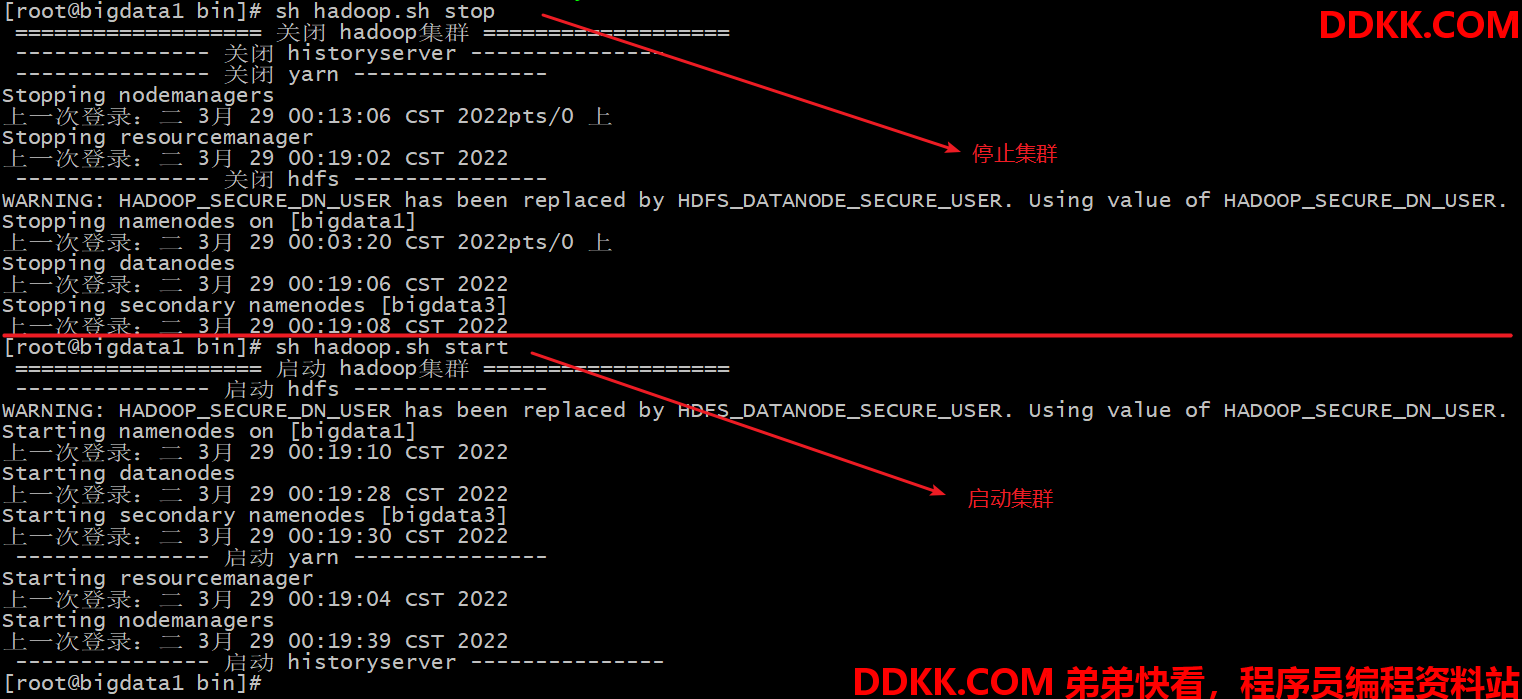
7. 配置集群一键脚本
在/root/bin 目录下,编辑 hadoop.sh 文件(vim /root/bin/hadoop.sh ),添加如下内容:
#!/bin/bash
if [ $# -lt 1 ]
	then
    	echo "No Args Input..."
    exit ;
fi
case $1 in
"start")
        echo " =================== 启动 hadoop集群 ==================="
        echo " --------------- 启动 hdfs ---------------"
        ssh bigdata1 "/opt/module/hadoop/sbin/start-dfs.sh"
        echo " --------------- 启动 yarn ---------------"
        ssh bigdata2 "/opt/module/hadoop/sbin/start-yarn.sh"
        echo " --------------- 启动 historyserver ---------------"
        ssh bigdata1 "/opt/module/hadoop/bin/mapred --daemon start historyserver"
;;
"stop")
        echo " =================== 关闭 hadoop集群 ==================="
        echo " --------------- 关闭 historyserver ---------------"
        ssh bigdata1 "/opt/module/hadoop/bin/mapred --daemon stop historyserver"
        echo " --------------- 关闭 yarn ---------------"
        ssh bigdata2 "/opt/module/hadoop/sbin/stop-yarn.sh"
        echo " --------------- 关闭 hdfs ---------------"
        ssh bigdata1 "/opt/module/hadoop/sbin/stop-dfs.sh"
;;
*)
    echo "Input Args Error..."
;;
esac
修改脚本执行权限:
chmod 777 /root/bin/hadoop.sh
停止和启动集群如下图所示: